

Here’s some automation that can easily be done using no-code approach. Last week I got home late and saw my wife still working on some stuff. It turned out that she needed to make some description documents for around thousand invoices for one of her customers. She told me she planned to do that over the weekend. I looked at the data and immediately felt that this looks like a job for… power automate.
It took me around 20 minutes to build the flow, half an hour researching which connector to use 🙂 and almost one hour fighting with MS Excel to get the dates populate properly. I swear, world would be a happier place if Microsoft fixed the dates in Excel. Anyway, back to the guts of this post, here’s what I did and what you might do as well.
Format Excel data to be in a table
First of all, to make your life easier just format the data into a table. This allows Power Automate connector to iterate through rows and get column names correctly. To do that, select whatever data you have and click on Format as Tableon the Table Design tab. Give it a name, we will need it later:

Prepare Word template
We need to set up Word template so that our flow knows where to put the data it got from the Excel. That’s where Content Controls come in handy. First, enable Developer tab from the settings (File -> Options -> Customize Ribbon:

Second, select a place in the document you want to populate with the data from Excel and add Plain text content control. It is important to select plain text, as for some reason rich text control is not visible in Power automate:
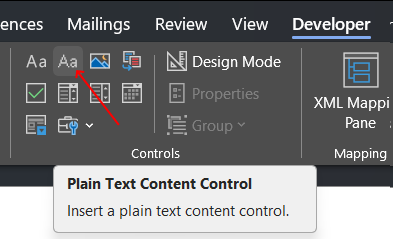
Next, hit properties and set a title.
Upload both files to SharePoint
I’ve created two folders input for the Excel and Word template files and Output for generated documents. Feel free to choose otherwise 😉
Create Power Automate instant flow
Now, the bread and butter — navigate to https://make.powerapps.com and create an instant flow. I chose to start from a template, but it doesn’t really matter. The trigger might be adding a document to SharePoint, clicking in Canvas App or anything else. For me it was a manual run.
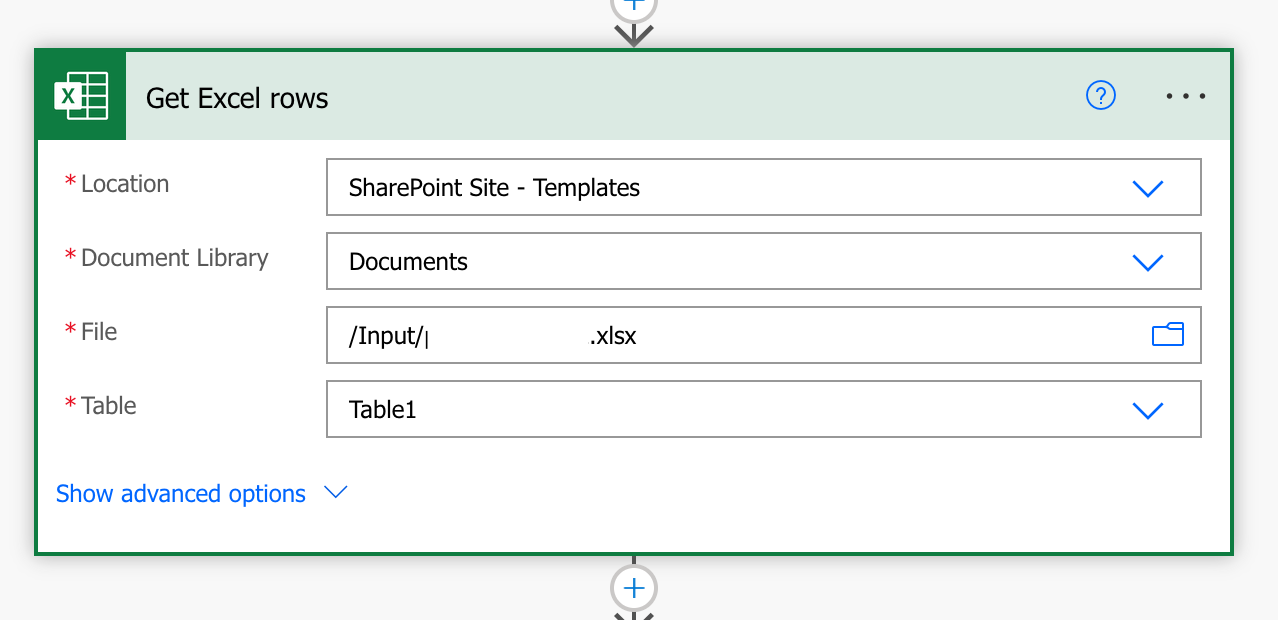
Next if you’re like me, you’d think we should first connect to SharePoint, open Excel file and fetch the rows. That’s how most programmers would approach this and this the place where I lost my time looking for the correct connectors. It turned out to be a very simple and intuitive (for non-programmers) option: List rows present in a table. Yes, it’s that simple. You just select that, put the location of your file and the name of your table:
Now that we have that we simply select Populate a Microsoft Word template, select the template from SharePoint and you will see all your content components you’ve created (no rich content component!) on your left, and you can select values from your table using column names.
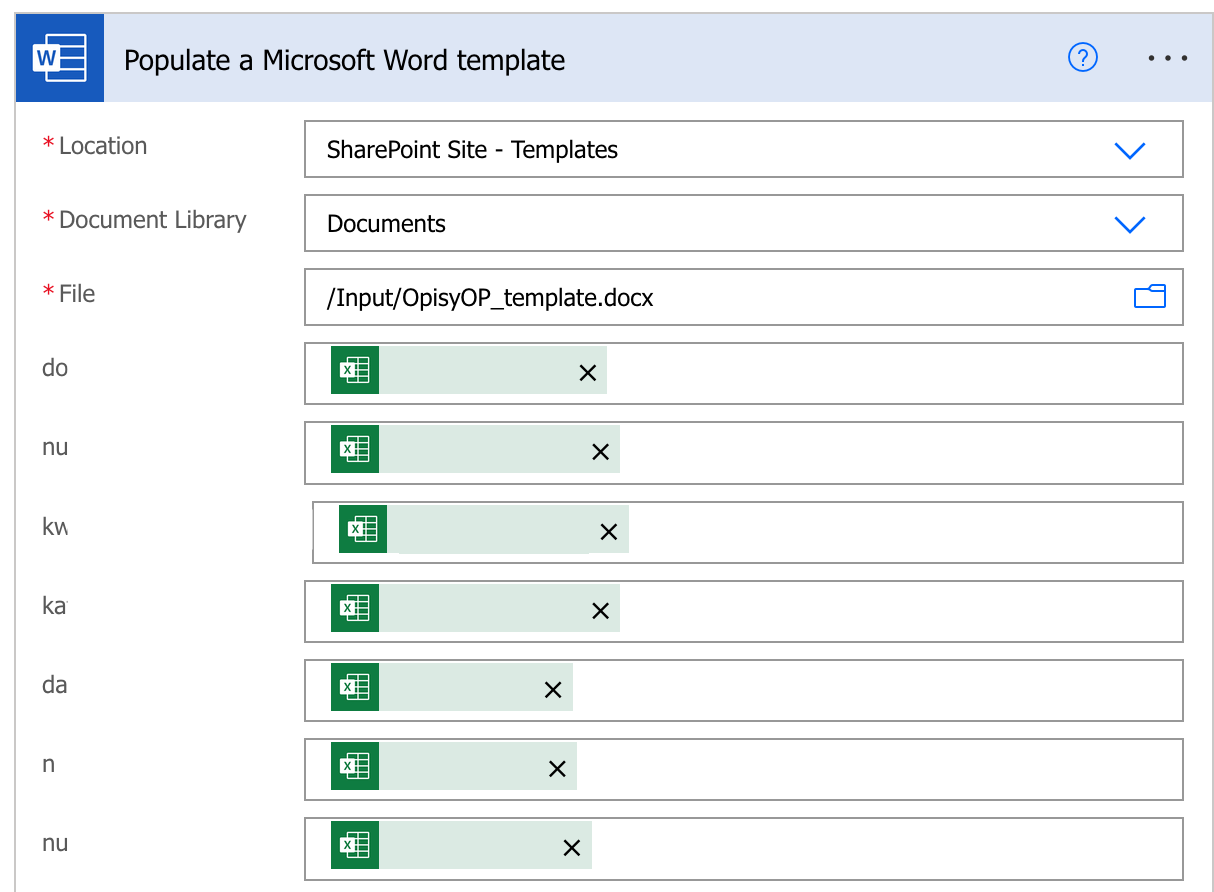
Once you start filling the values from columns Power Automate will automatically add the for each component.
Save document into new
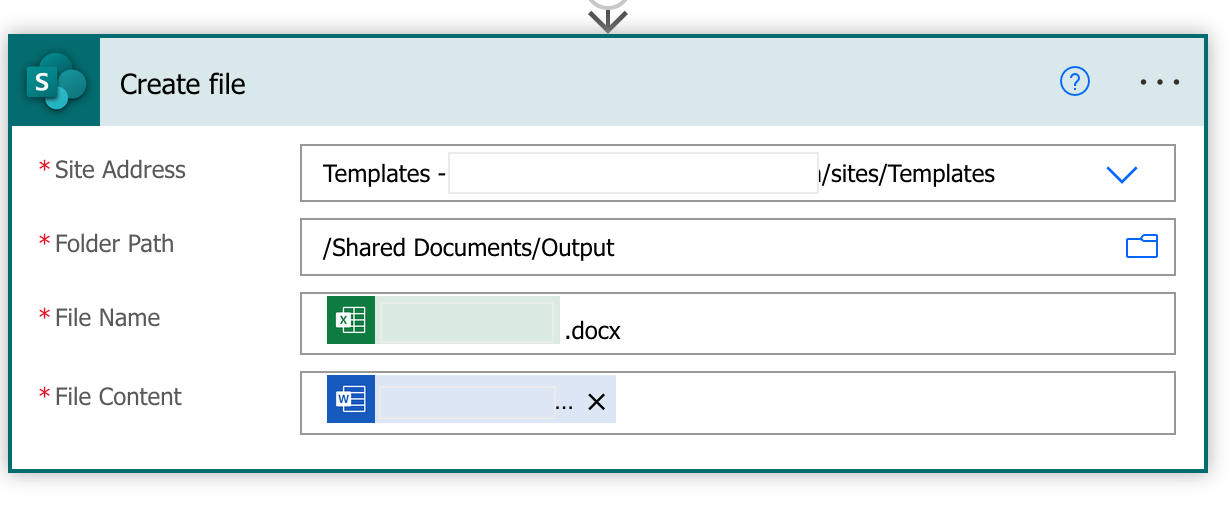
This one is easy. Just hit that Create file from SharePoint connector and fill the data. In my case I just created them in the output folder and gave it a name from one of the columns. This way I can easily reference the file to the row in the Excel:
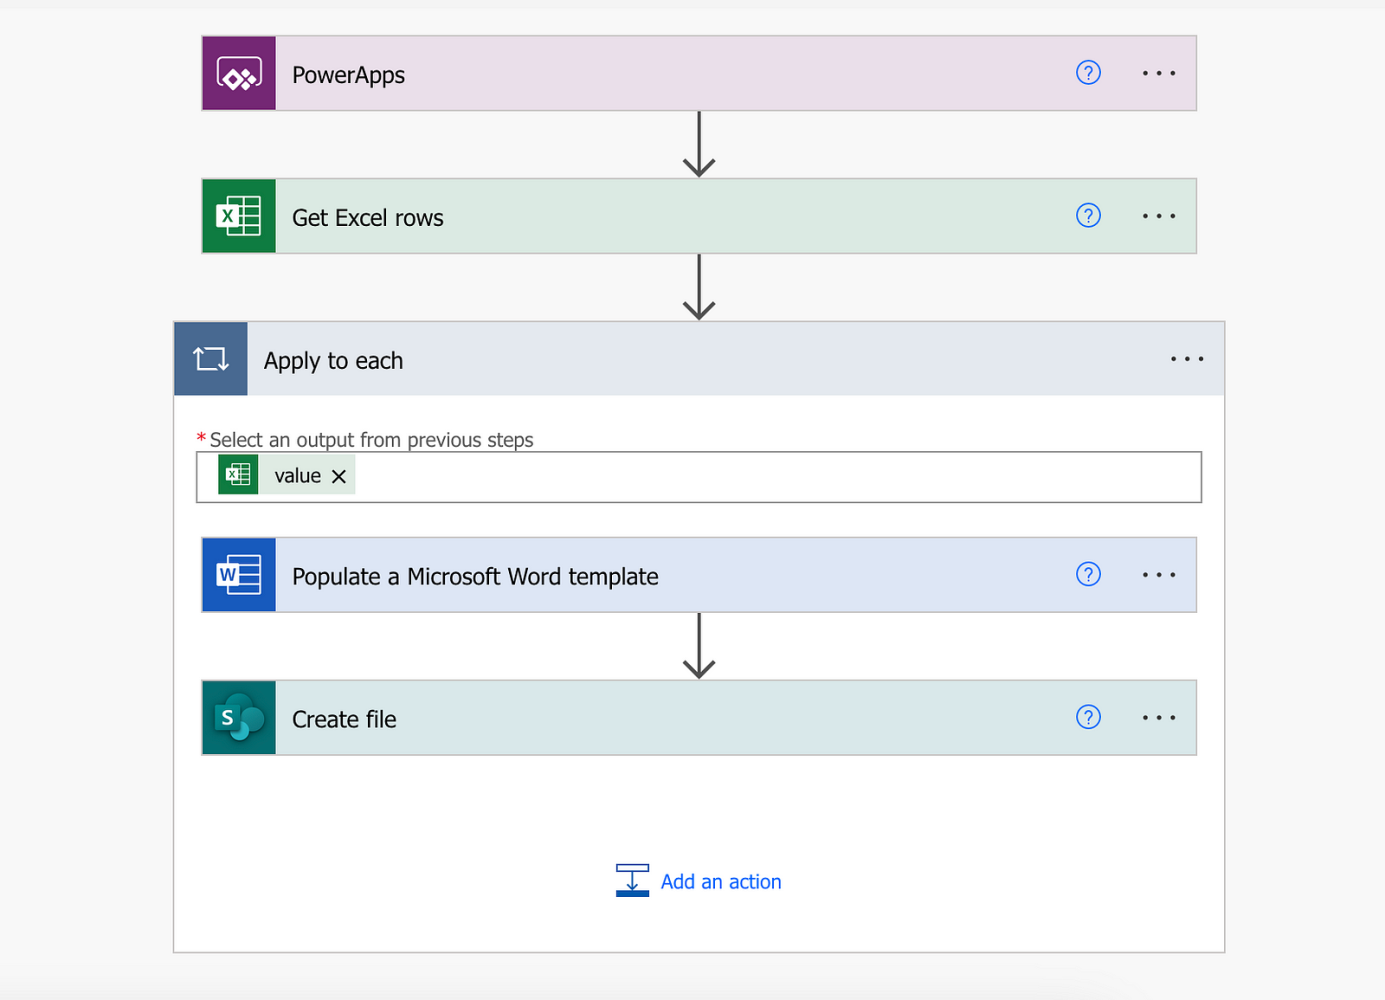
The whole flow should look more or less like this:
Now run some tests and let’s see what happens. It all looks promising, but upon further investigation of result files it turned out that some the data did not fill correctly.
Fix Excel formatting
Of course. The date is not correct. Who would have thought, right? We need to fix this unless you’re happy with having 45054.00 instead of 08–05–2023 (or whatever other format you use). I found it that the simpliest way is to and apostrophe symbol before the date changing it to text and removing all that unnecessary operations Excel tries to do. After that it should be OK. Be sure to copy the values instead of formulas. It might also save you some time figuring out what is wrong.
Test again
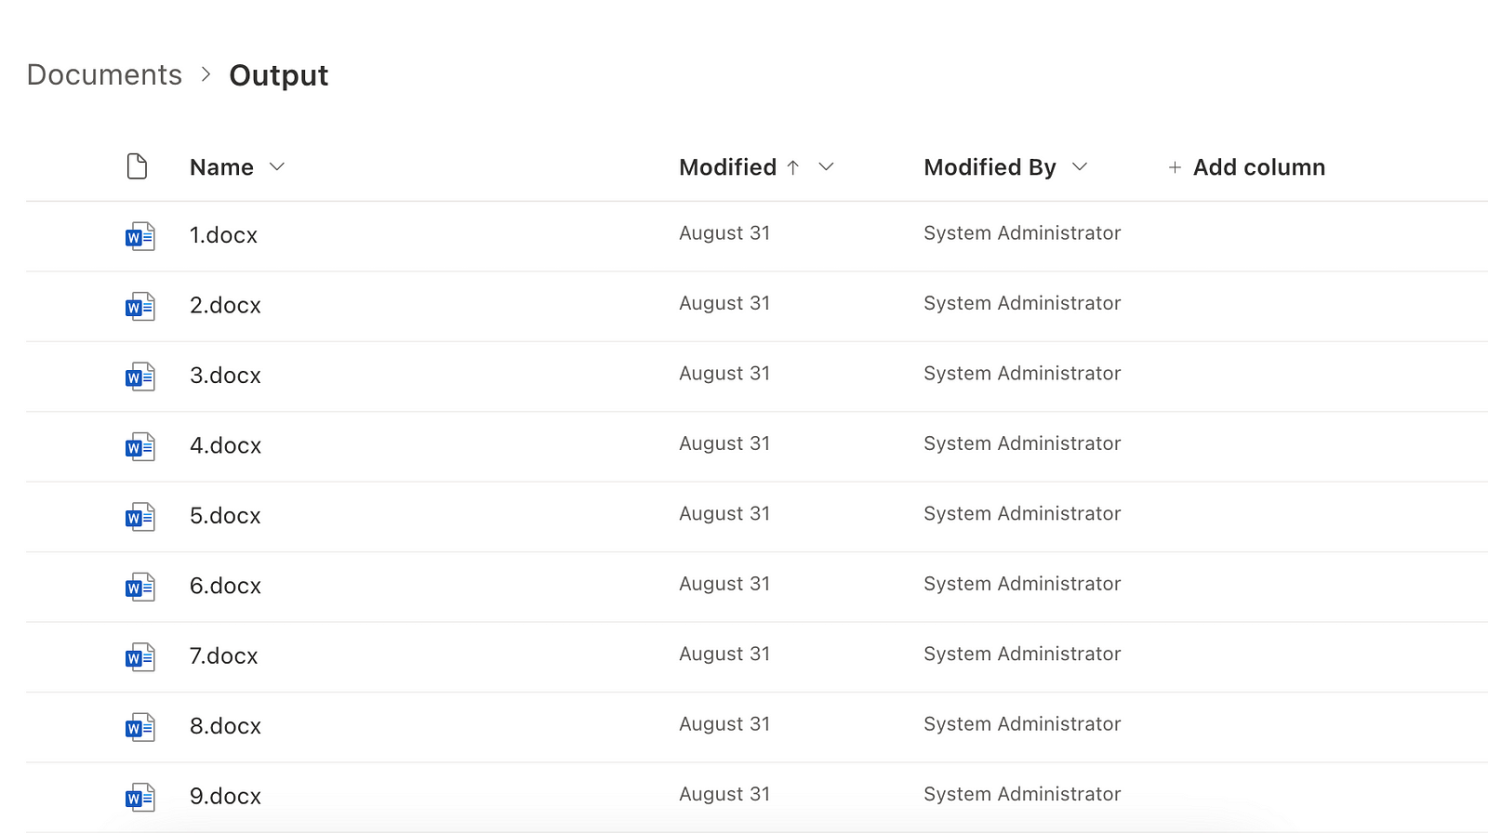
Now it should work fine and files should appear in the folder:
One thing though, the first time I run this it only created 250 files. I needed to go to the Excel component in the flow and update the number of rows fetched.
We’ve saved ourselves a weekend 🙂
Stay coding!


3 thoughts on “Populate word template from Excel table in Power Automate”
Artykuły tego bloga to jak kamienie milowe na drodze poznania, a autor to jak mądry przewodnik, który pomaga czytelnikowi pokonywać kolejne etapy intelektualnej podróży.
Pouczająca lektura! Doceniam szczegółowość i dokładność. Szkoda tylko, że niektóre fragmenty są zbyt techniczne dla laików. Mimo to, świetne źródło wiedzy!
Cześć, dzięki za komentarz. Które fragmenty były zbyt techniczne? Może uda mi się wyjaśnić/poprawić?
pozdrawiam,
p.